Showing posts with label looks. Show all posts

Monday, January 30, 2012

Desi-Bride Inspired Look Tutorial

Hello my lovelies! I'm still recovering from a flu attack and despicable migraine incidences that I'm hardly finding time to do some posts. Although I have a long list of reviews and tutorials coming up, it might take a few more days for me to get back to my normal routine, so please bear with me.

Today I was able to do a tutorial that is inspired by Desi brides. It is very easy, yet very dramatic and is really pretty. Weddings in the indian subcontinent are one of the biggest, most lavish celebrations in the world. Every detail is marked by elaborate, florid preparations. Brides are adorned in very intricately designed clothing, ornate jewelries and of course, the make-up is just absolutely dazzling! So if you want to relive those wonderful memories again or would want to look like a stunning desi bride, please continue reading.

Things I used:
MAC soft ochre paintpot
MAC Cranberry e/s
MAC Goldmine e/s
MAC Nylon e/s
MAC Black tied e/s
MAC blacktrack fluidline
mascara
ardell scanty lashes
lash glue

1. Apply soft ochre paint pot on the entire lid. You can also lightly dust powder on your lower lashline towards the cheeks to easily clean eyeshadow fallout later.


2. Using a flat shader brush, pack in goldmine eyeshadow on the entire lid.


3. Add cranberry e/s on the crease.


4. Apply black tied eyeshadow using a bullet brush on the outer V to create depth and dimension.


5. Blend the two colors lightly, and this is what it should look like at this point.


6. Apply nylon eyeshadow on the mid of the lid, on the inner corner of the eye extending it to the inner lower lid.


7. Using an angled brush or any small brush, apply black tied e/s on the lower lid, just below the lashes.


8. Add cranberry just below the black tied e/s, and blend it so it overlaps a bit with the black shade.


9. Apply eyeliner on the upper lashline. You can either do a simple liner or a winged one.


10. You can now apply false lashes (not my favorite but I did it for this look), add mascara, apply kajal on the waterline if you choose to, and voila, here's the final look:


I hope you liked this short post! See ya<3

Tuesday, January 17, 2012

Daytime Silver Smoky Look


Hello my lovelies! I hope you're all doing good today. I'm going to share with you my favorite type of eye make-up: the smoky look. It is a common misconception that a smoky eye involves only black shade. You can create smoky look with almost every color from browns to blues, metallics, greens and of course, the classic which is black. Smoky eye gives a lot of definition to the eyes and makes them look sultry and sophisticated. Although it is a bit dramatic and is usually reserved for evening parties, what I'm going to show you today is a lot brighter than the usual type and can be worn during the day. Please keep on reading if you want to know more about it.

Products that I used:
NYX Jumbo Eye pencil in Pots and Pans (silver base)
MAC Silver Ring e/s (medium to dark silver)
MAC Blank Type ( matte light beige)
MAC White Frost ( frosty white)
UD 24/7 Liner in Zero (black pencil liner)
MUFE Aqua Liner in 23L(champagne pencil liner)
MAC Blacktrack fluidline (black gel liner)

1. Apply NYX jumbo pencil directly on the entire lid.

2. Trace the outer V using the black pencil eyeliner.


3. "Smoke"out the liner using a bullet brush by blending the edges.


4. Add silver ring e/s to the crease.


5. Apply white frost eyeshadow on the inner corner and middle of the lid.


6. Draw a thin line under the lower lashline using the black pencil liner and blend it out.


7. Layer silver ring eyeshadow over the black eyeliner and until the inner corner of the eye.


8. Highlight the brows using Blanc type e/s.


9. Apply gel liner, tightline, and add mascara.


10. Apply the MUFE 23L on the waterline.


And here's the finished look:


I hope you liked this post and as usual, if you have any questions, suggestions or reactions, please leave me a comment:) See ya<3

Friday, January 13, 2012

Green Look Tutorial


Five days passed and not a single post from me:( I'm starting to become a lousy blogger. I hope you forgive me.

Anyways, enough of my drama hahaha. I hope you are enjoying a good weekend like I am, and for those who haven't had their best days of the week yet, I wish you a pleasant one. I had a tough week that kept me occupied. My son had otitis media(middle ear infection) and it was horrible. He was in a lot of pain but thanks to modern medicine, painkillers alleviated his suffering and kept me sane. He had to miss school though because the infection itself was still in full swing so I had to teach him at home. But everything's fine now andI'm so happy and thankful that my lil one is back to his old, healthy and cheerful self again. I'm spending  the rest of the weekend watching movies and reading novels which is also a huge passion of mine.  Last night we went out for dinner with some friends which was great.


I wanted to do a tutorial about a certain look but I was too confused and didn't know where to start. I looked back at my previous looks that I posted(there are only two btw) and I realized that they're both neutrals.  I also wanted to counter the gloominess of my previous week so I decided to work with something that has color and life. And speaking of life, I pictured plants and their leaves that are of course very important in maintaining our planet and our kind. Oooooppps, I was just kidding! I thought of making a green look tutorial simply because it's my favorite color. This look is very dramatic and is not for the faint-hearted. It is more suited for night-outs and evening parties/gatherings. I hope you like it:)

Here are the things that I used:
UD Primer Potion

MAC Juxt
Humid
Blacktied
Ricepaper
MUFE Aqua Liner in 17L
Black pencil liner
Maybelline Lasting Drama Gel Liner
Covergirl Lash Blast

1. Prime your  lid by applying a dab of UDPP and smooth it all over.


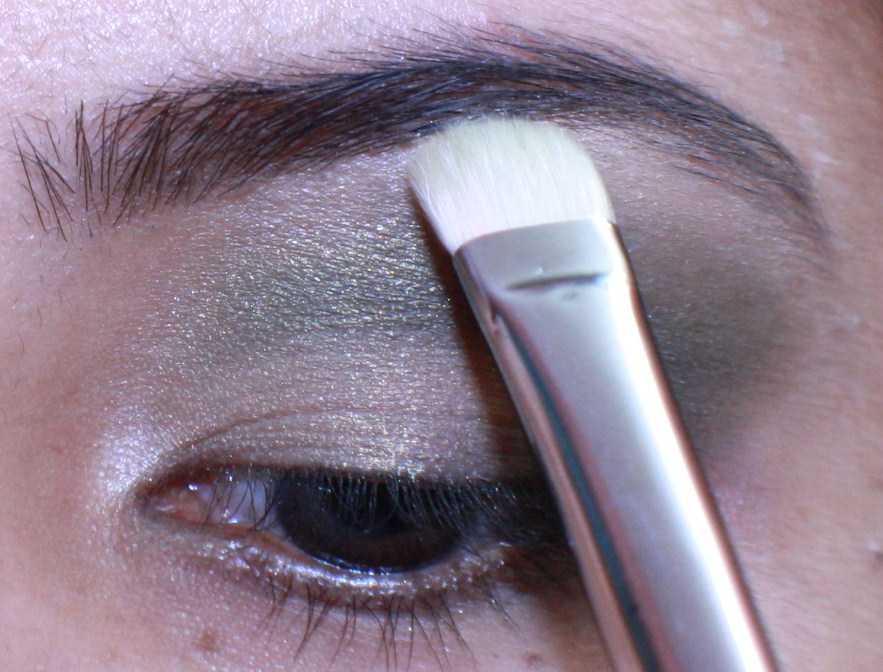
2. Apply Juxt eyeshadow on the entire lid using a flat shader brush.


3. Add Humid on the crease using a blending brush.
 

4. This is what it should look like at this point.


 5. Blend Humid up to the crease using a fluffy blending brush.


6.  Create depth and prominence to the eye by adding Black Tied on the outer V.


6.  Blend, blend, blend so there's no harsh demarcation of colors.


7.  Apply Ricepaper to the browbone  to highlight.


8. Highlight the inner corner by applying Ricepaper using a pencil brush.


9. Apply Humid on the outer lashline using a short, stiff flat brush. Connect the shade as if you're making a line towards the end of your brow.


10. Apply juxt on the inner lashline, using the same brush but make sure to wipe it clean first.:)


11. And you'll have something like this.


12. Add eyeliner on the upper lashline. I chose to do a subtle winged-liner to match the dramatic look.


13. Apply MUFE Aqua Liner in 17L on the waterline.


14. Tightline using a black eyeliner and apply mascara. And here's the finished look.


I hope you enjoyed reading this post and if you have any questions, please don't hesitate to leave me comments. Thank you so much for all blog lovin' and support! See ya<3

Sunday, January 8, 2012

Eyeliner 101 and a Cat-Eye Tutorial


One of the most popular eye makeup all over the world is the eyeliner. It is used everywhere to beautify the eyes. In some cultures it is used as a means to ward off evil and some even believe that it can improve eyesight. But of course, I won't be giving you a long lecture about the history of eyelining because I'm sure wikipedia has an entire page about it:)

For cosmetic use, the main purpose of eyeliners is to make the eyelashes look fuller. It is also used to accentuate or enhance one's eye shape. It comes in various forms and is available in every color imaginable although black is still the most common choice.

Today I'll be giving you a short introduction about the common types of eyeliner that are available in the market.

Pencil Eyeliner

-the most common type and probably the easiest one to use since I'm sure everyone of us knows how to grip and draw a line using a pencil:) But there's one problem, pencil liner cannot create crisp and precise lines, so it's not a very good choice when you want to make a thin line especially on the upper lashline. It's however perfect for smudging and is thus a staple when making a smoky eye look. It's also soft enough to be used on the waterline and for tightlining.


Liquid Eyeliner

-this type of eyeliner is in an ink form which usually comes with a felt tip applicator. It creates very thin and precise lines. Liquid liners are the top choice in making winged liners. But when it comes to ease of application, this one is definitely the toughest to master, at least for me. Another drawback of a liquid liner is that it can't be used on the waterline.


Gel/cream liner
- just like what the name implies, it comes in a gel form and is applied with a brush. It can create a thick line as well as the thinnest of lines depending on the brush and the stroke. It's also safe to be used on the waterline. It's my top pick because of it's versatility.


Pen-style liner

- is a cross between a pencil & liquid liner. It is gaining a lot of popularity because it delivers the same precision that a liquid liner does with a lot of ease because it's in a pen form.


Now let's go to the difficult part, on how to actually line the eyes properly. Although it seems so simple and easy, eyelining is one of the more difficult aspects of makeup especially for beginners. Not that it's complicated but it requires a lot of accuracy and drawing the same perfect line for both eyes is really tricky. I'm gonna show you a short tutorial on how I do my eyeliner, specifically the winged eyeliner also known as cat-eyes.

The gel liner using the Sephora Eyeliner brush:
Start on the middle of the lid going towards the outer corner. Keep the line as close to the lashes as possible.


Extend the line going a bit upwards using your lower eyelid & the end of your eyebrow as guide as shown above.


Now line the rest of the upper lashline starting from the middle again, and making sure that the line is thinnest on the inner corner.


This is what it looks like at this point. Since I have narrow and small eyes, I skip lining the innermost corner.

Using the same guide, extend the tail of the line up to the desired length of your cat-eye.


Now flick the brush towards the end of the eyebrow to make a hair-thin tail for that signature cat-eye look.


And here's the finished product:) You can connect the line towards your lower lashes to create a more dramatic look.


And here's the cat-eye in action. I used MAC Patina all-over the lid, Woodwinked on the crease and Phloof to highlight the brows and the inner corner of the eye. I smudged UD 24/7 liner in zero on the lower lid and used Bourjois Clubbing mascara on the lashes.


I hope you found this post helpful. And don't be frustrated if you cannot perfect the eyelining skill on the very first attempt. It took me several tries and lots of make-up remover and q-tips before I was able to create decent lines. Never underestimate the power of practice and patience.

Please don't hesitate to leave me comments if you have questions, suggestions or violent reactions:) See ya <3